Dienstag, 9. Juni 2020
Implicit competition rules on the orienteering map (in german)
We lately noticed that not all athletes nor organizers do know all the implicit competition rules represented on the competition map. I thus assembled a fact-sheet for Swiss orienteering runners to summarize these rules. (rules vary between different Federations and the IOF).
It is a .pdf in german to download
And here are the page-shots.
Freitag, 15. März 2019
Mappers Blog: Focusing illusion.
fig.1. A post by Rob Plowright under a thread about mapping details in the facebook group Orienteering Mappers Int.
I want to keep this for my records as it can be seen as a nice example of the focusing illusion that contaminates orienteering maps.
It works like this: The mapper constantly overestimates the importance of the feature s/he is just looking at. S/he imagines a course setter or a runner complaining on the generalization of just this feature and thus s/he is horrified of imagined scene. The only viable solution is to map the actual situation in detail, even if in detail makes the map hard to read and to identify the feature itself.
The problem with this approach is obvious. While the course-setter could also be infected by the same focusing illusion the athlete definitely ain't.
The athlete focuses on solving the orienteering task. His/her attention is on matching map with terrain and execution of route choice.
Watch this video. I think this will make my point clear.
As long as the map does not provide wrong information, harming a route choice and thus spoiling a race to the athlete (closed entrance mapped open; impassable fence mapped passable; green worse than mapped) or in other words as long as the gorilla does not block the way, the athlete would never complain about some out-of-bounds stair/bridge generalized. Meanwhile over-mapping due to unconsidered focusing illusion is missing to map in accordance to the maps purpose.
Mittwoch, 18. Mai 2016
Mappers Blog: Locator- and Basemaps Zürichberg
fig.1 The old map from 2008.
fig.2. ... a relief ...
fig.3. ... the contours 1.25m ...
fig.4. ... the clearings ...
fig.5. ... and finally the conifers.
Figures 3-5 are pngs with transparencies, thus can be used combined.
Mittwoch, 28. Oktober 2015
Mappers Blog: Bannwald Setup/ Symbolization, localization and cartography
fig.1. Map from 1984
Assessment
I had to figure out, how to tackle the task and there where basically two questions to answer.1) How to get there? - The slope is situated from 700 to 1000 a.s.l. and starts about 250m above the closest transport stop in Küssnacht a.R. (about 50km from where I live). There is a cable car running up to Seebodenalp but with a restricted time table and a restricted connection to the public transport. No cheap accomodation in the area. I can not loose to much time getting there and away.
2) How to localize? The regional council provides us with a laser-DEM and -DSM but it was produced in back in 2002. This means it has a relatively poor point density, is rastered, filtered (extracted leaf-trees), smoothed (extracted boulders) and in regard of the vegetation partly outdated. Thus a pretty oldtimer compared with a nowadays point cloud. In a relatively uniform slope with lots of stones and cliffs and rocks but also green features to be localized, such a base is not sufficient. As the slope is facing north-east GPS is no big help (actually when ever was GPS a help :-P).
New tools
Thus I was forced to update my setup and did this by:1) Buying a scooter
fig 2. A scooter is the mappers best friend...
2) Borrowing a Range Finder
fig.3. No! The Range Finder is the mappers best friend.
It is a TruPulse Range Finder able to measure horizontal and vertical distances, something especially handy in steep terrain.
Usual Hardware/Software-Setup
Otherwise I the setup has not changed essentially since my last documentation. I am still very happy with the combination of OOMapper on a waterproofed Samsung Galaxy Note 2 (inductive pen technology).fig.4. The Bannwald Setup (note the waterproofed pen)
Hybridal Mapping with OOMapper
One of the advantages of OOMapper compared with OCAD is the possibility to map hybridal: While you can digitize smaller features right away, you just can sketch features "under construction" f.ex. contours and larger areas with undergrowth.fig.5. Screenshot Hybridal Mapping with OOMapper.
Symbolization, localization and cartography
For me nowadays, mapping is a three step procedure, symbolization, localization and cartography (generalization & legibility) or with other words: What (aka ISOM)? Where on the map? and Does the map work (aka cartography)?Localization
While it was a big part of the job to localize map features correctly in the older days, I aspire to have this problem solved beforehand. Localization should generally be no big question. In the case of Bannwald I could base localization on these three base maps I could switch between.fig.6. As done before I work with the 1.25m contours which also work as bands for contour and evtl. form-lines. Basemap calculated with OL Laser.
fig.7. The contours I combine with the vegetation height (the contour layer is semi-transparent). Basemap calculated with OCAD.
fig.8. Rarely I also used the steepness perspective. Basemap calculated with OL Laser.
Finally the mentioned range finder was the crucial tool in regard of localization. The model I borrowed would be able to directly communicate with OCAD by bluetooth. Although myself working with OOMapper I had to manually draw the measured distances on the map. For this purpose I used a helper symbol consisting in a 20m long scale.
fig.9. Helper symbol 20m scale
fig.10. Map draft with included range finder measurements.
Life cartography
Besides the possibility to switch between base maps as it suits you best, digital mapping has an other big advantage in contrast to the good old analog one: Now cartography can be considered on-site. I do this by using a set special set of symbols, I developed for the purpose of field work. This leads to that all cartographic conflicts can be solved right away.fig.11. Some symbols of the field set.
Hence
So this was probably the hardest job I ever made spending 18 days to map 1.3 sqkm. If I would not have adapted my setup, it would have taken much longer. The map will be published next spring to be used for the 39.Innerschwyzer OL. Come and try!Dienstag, 20. Oktober 2015
Mappers Blog: It was not your fault! Blame the map.
The map
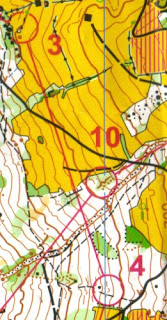
So first, here is the competition map. Have a look at it. Which controls might be tricky?
The rates of mistakes
Here is what winsplits says, if we apply the default 20 seconds/20 percent rule.And btw. he total number of participants is 46.
Control by control
The first control is a short one and actually pretty easy. I can be spotted from 50m. Still there is a 30% mistake rate (MR) here. Partly it can be explained with the stressed starting situation. But otherwise one has to admit, that the control ring mask the bigger land form. Also there is a missing dash point on the eastern small knoll.Same excerpt without overprint.
The second control was easy on the leg, but it seems some (20%) had problems to find the right side of the right stone here. Note how the contours interfere with the black objects.
Then a series with easier controls to 4 ....
... 5, 6, 7....
... 8 and 9. The easiest control of the course.
10 also looked easy but it some took it too easy. Might be a consequence of the climb to 8.
In this section the overprint again masks the terrain. Mostly the dell on the way into 11 and along the gully towards 12. At 12 the MR starts to rise again to over 20%. The mapping inside the control circle is not that clear.
And now to the most tricky section. At 13 MR is 30%, 14 tops with 43% and 15 follows with 21%. 13 and 14 are pretty easy legs, if you look on the map excerpt without overprint below... 13: follow the ditch, 14: follow the valley. A smaller mapping issue can also be spotted south-east of 13 where the contour has a gap crossing the ditch.
After a pretty physical leg to 16 with a low MR 17 and 18 came back with 26% MR both. The cartographic issues here: The small knoll south of 17, suiting as attack-point is very prominent, but was drawn with a form-line due to over-correctness. A possible source of irritation. Then on running speed it was not possible to see that the 17th was no boulder but a knoll. Small brown surfaces just melt together with black.
The cliff for the 18th control was, as you can see from the excerpt below, added to make a control point by the course setter... and therefore was the least prominent cliff mapped on this map.
The last control was no problem from this side. But the elder Hubmann lost some precious seconds going straight over the hill from south-west. Also here the over-print mask the contours.
Resolution
1) Check for the effect of the overprint on the terrain representation, not only the control ring but also the connecting line.2) Check for legibility issues not only for features with the same color but also between features with similar colors (brown-black)
Montag, 9. Dezember 2013
Mappers Blog: Some perspectives of a mapping project
fig.1. Planning tool. I spared the easy and isolated parts of the map for the last. Stepped from demanding with old map (1-2) to difficult with old map (3) to demanding without old map(4) to run-in (5-6). Going towards winter, the idea was to do all demanding stuff before it got to cold.
fig.2. DRAMA! :-)
fig.3. A basemap ...
fig.4. ... and the fieldnote.
fig.5. My orienteering friends marked many of the really important features they wanted to have on the new map. :-)
fig.6. Rain was a no go with my actual setup.
fig.8. Black spots and red spots show places with bad laser coverage. After a while you realize that it is always where it comes to steep rock formations. Obviously the Swedish authority uses similar building removal algorithms as the swiss do.
fig.9. Did I publish that before? My final setup was about 40g for the base plate plus 40g for the compass.
fig.10. Some comparisons with the old map by Vidas Armalis: before ...
fig.11. ... and after.
fig.12. Before ...
fig.13 ... and after.
fig.14. Before ...
fig. 15. ... and after.
fig.16. Before ...
fig. 17. ... and after.
fig.18. Excerpt of my moving pattern. Pattern density depended primarily on the object density and the visibility.
fig.19. And here the entire moving pattern.
fig.20. The longest contour line 14km
fig.21. The time it takes to digitize per km2 for different parts of the map. The crucial factors are the object density and the field note quality (the amount of additional interpretation while drawing).
fig.22. The total time per km2 for different parts of the map. The heaviest parts take up to 130 hours per km2, then there is normal for about 100 hours per km2 and easy for around 40 hours per km2. Main factors here are the visibility, the relief and the object density.
fig.23. Mapping is about searching for objects in the forest. Besides what I call Easter eggs (big stones in the nowhere, where you though this area is about to be done) there is different kinds of waste (former camp-sites, disposed cars, bicycle dress and helmets, sewing machines, buckets, buckets, buckets, fridges a.s.o.), berries and mushrooms to be found. This chair a Höganäs Chair No.1, was pretty special because it is the same model I use for my long-term project portraying the offspring of my grand-parents.
o-zeugs over and out (late wc china finding)
Yes. Let the o-zeugs blog rest in peace. I´ll take it down eventually. And yes, I stumbled over the decisions of the Ethics Panel regarding ...
-
I here describe the way of the couch-mapper or with other words how far you can get with a swedish .las file (and karttapullautin , OL Lase...
-
Yes. Let the o-zeugs blog rest in peace. I´ll take it down eventually. And yes, I stumbled over the decisions of the Ethics Panel regarding ...